
Photo to SVG Prep
Isolate people from a photo, clean the mask, then prepare a silhouette or split-aware line-art SVG for STLPlayground builders and other vector workflows.
Clean up photos before SVG conversion. Isolate your subject, refine masks and edges, remove unwanted areas, and prepare complex images for cleaner vector tracing and 3D printing.
Prepare Photos for Cleaner SVG Conversion
Photos are much more difficult to convert into clean vector artwork than logos, icons, or simple graphics. Backgrounds, shadows, fine details, textures, hair, lighting changes, and other photographic elements can create complicated vector geometry that is difficult to use for 3D printing.
The STLPlayground Photo to SVG Prep Tool helps you clean up and simplify a photograph before converting it into SVG artwork. Isolate the part of the photo you want to keep, refine the subject mask, clean troublesome edges, and remove unnecessary details so the image is better suited for vector tracing.
This tool is designed to be the first step when your source image is a photograph or other complex raster image rather than clean, flat artwork.
From Photo to SVG to 3D Print
A photograph contains far more information than most 3D designs need. Subtle color changes, shadows, textures, backgrounds, and small details may look natural in a photo but can create hundreds or thousands of unnecessary shapes when the image is traced into vector geometry.
A better workflow is to simplify the photo first:
Photo → Clean & Isolate Subject → SVG Conversion → STLPlayground Builder → 3D Model
Use the Photo to SVG Prep Tool to prepare your artwork, then continue with the Image to SVG Converter to create clean vector paths.
Why Prepare a Photo Before Converting It to SVG?
Automatic vector tracing works best when the software can clearly determine which shapes belong in the finished design. Photographs make that difficult because they often contain gradients, shadows, background objects, soft edges, reflections, texture, and other details that are unnecessary in a printable design.
Preparing the image first can help:
- Separate the main subject from the background
- Remove objects you do not want in the finished design
- Create cleaner outside contours
- Reduce photographic noise and unnecessary detail
- Improve silhouette quality
- Make later vector tracing easier
- Reduce unnecessary SVG geometry
- Create artwork that is easier to turn into printable 3D geometry
Isolate the Subject of Your Photo
The first goal when preparing a photograph for SVG conversion is determining what should remain in the finished artwork.
Instead of asking a vector converter to interpret the entire photograph, use the prep workflow to separate the person, animal, object, shape, or other subject you want to preserve.
This is especially useful for photos containing:
- People and portraits
- Pets and animals
- Vehicles
- Sports poses
- Objects and products
- Costumes and characters
- Decorative subjects
- Other recognizable silhouettes
Refine the Image Mask
Automatic subject isolation can provide a useful starting point, but photographs frequently contain areas that need additional refinement.
Use the mask refinement controls to decide exactly which portions of the image belong to the subject and which areas should be removed. Cleaning the mask before vectorization can make a major difference in the quality of the resulting SVG.
Pay particular attention to complicated areas such as hair, hands, clothing edges, narrow gaps, overlapping objects, shadows, and areas where the subject and background have similar colors.
Clean and Refine Important Edges
Once the main subject has been isolated, inspect the edges that will eventually become vector contours.
A photographic edge that looks acceptable at normal image size may contain bumps, gaps, irregular transitions, or unnecessary detail when converted into a vector path. Refining those areas before SVG conversion gives the tracing process a cleaner shape to follow.
Focus on the overall recognizable form of the subject rather than preserving every pixel from the original photograph.
Make Manual Line and Shape Adjustments
Some images need more than automatic processing. Manual cleanup can help correct areas where the source photograph does not clearly define the intended shape.
Use line and edge adjustments to simplify awkward contours, repair important boundaries, remove unwanted regions, and create a cleaner representation of the subject.
As you refine the image, save meaningful improvements as your new working version so additional cleanup can build on the work you have already completed.
Prepare Silhouettes From Photos
The Photo to SVG Prep Tool is particularly useful when the final design will use a silhouette.
A successful silhouette relies on the outside contour and important negative spaces rather than the photographic detail inside the subject. Removing unnecessary information makes it easier to transform a person, pet, object, or pose into recognizable vector artwork.
Silhouette-style artwork can then be useful for:
- Signs and nameplates
- Medallions and pendants
- Decorative inserts
- Sports and team designs
- Personalized gifts
- Raised or recessed graphics
- Custom props and displays
- Other 3D printed artwork
Photo to SVG Prep vs. Image to SVG Conversion
The Photo to SVG Prep Tool and the Image to SVG Converter solve different parts of the process.
Photo to SVG Prep is designed for complex photographs that need subject isolation, mask refinement, edge cleanup, and simplification before vector tracing.
Image to SVG Converter takes prepared raster artwork and traces it into actual SVG vector paths.
If you already have a clean logo, icon, transparent PNG, clip art image, or other flat graphic, you can usually go directly to the Image to SVG Converter.
If you are starting with a photograph, complicated background, or subject that needs manual cleanup, start with Photo to SVG Prep first.
Why Clean Artwork Matters for 3D Printing
Vector artwork used for 3D printing eventually becomes physical geometry. Tiny bumps, disconnected regions, narrow slivers, accidental holes, and unnecessary shapes can all become part of the resulting model.
Cleaning the artwork before vectorization can help create:
- Smoother model contours
- More recognizable silhouettes
- Fewer unnecessary vector paths
- Cleaner raised and recessed artwork
- More reliable extrusion into 3D geometry
- Better results at smaller print sizes
- Easier processing inside compatible 3D design tools
The goal is not necessarily to recreate every detail in the original photograph. For most 3D printing projects, the goal is to preserve the features that make the subject recognizable while removing information that does not contribute to the final model.
Continue to the Image to SVG Converter
Once the subject is isolated and the artwork looks clean, continue to the STLPlayground Image to SVG Converter.
The converter can trace your prepared image into real vector paths that can be scaled, edited, exported, and incorporated into compatible 3D modeling workflows.
For artwork intended for 3D printing, review the resulting vector carefully and remove tiny shapes or excessive detail before using it in a model.
Use Your Finished SVG in STLPlayground Builders
After converting your prepared image into SVG artwork, you can use it with compatible STLPlayground 3D builders.
Many STLPlayground builders support custom SVG artwork alongside text, emoji, colors, dimensions, and other customization options.
For example, the Sports Medallion Builder lets you turn SVG artwork into a layered, wearable or display-style 3D medallion. This makes it useful for creating designs based on athletes, mascots, poses, logos, characters, and other custom artwork.
The Cheer Wand & Handheld Sign Builder also supports custom SVG artwork, allowing prepared graphics and silhouettes to become part of personalized team signs, props, event accessories, and decorative designs.
You can browse the complete 3D builder catalog to find additional projects that support custom artwork.
Tips for Better Photo to Vector Results
Choose a Photo With a Clear Subject
Photos where the main subject is visually distinct from the background are usually easier to prepare. Good lighting and clear edges can significantly reduce the amount of manual cleanup required.
Focus on Recognizable Features
For silhouette and 3D printing workflows, preserve the shapes that make the subject recognizable. Small photographic details often add complexity without improving the finished model.
Watch Negative Spaces
Spaces between arms and the body, between legs, inside handles, around accessories, and between overlapping objects may be important to the appearance of the final silhouette. Review these areas carefully during mask refinement.
Remove Background Details
Unwanted background objects can become accidental shapes during vector tracing. Remove them before continuing to SVG conversion whenever possible.
Simplify Difficult Edges
Hair, fur, foliage, fabric, and other highly detailed edges rarely need to be reproduced exactly in a 3D printed design. A cleaner simplified contour can produce a better vector and a stronger physical result.
Think About Final Print Size
A detail that looks important while editing a large photo may disappear completely when the finished model is only a few inches wide. Prepare the artwork based on how it will eventually be used.
Frequently Asked Questions
Does the Photo to SVG Prep Tool create an SVG?
The Photo to SVG Prep Tool is designed to prepare and clean photographic artwork for vector conversion. After preparing the image, continue to the Image to SVG Converter to create the final SVG vector paths.
Why not convert my photo directly to SVG?
You can trace a photograph directly, but photographs often contain backgrounds, shadows, gradients, textures, and thousands of small visual variations. These can result in complicated vector artwork that is difficult to use for 3D printing. Preparing the image first gives the vector converter cleaner artwork to trace.
Can I remove the background from a photo?
The prep workflow allows you to isolate the subject and refine which areas of the image should remain or be removed before vector conversion.
Can I manually clean up the subject?
Yes. Mask refinement and manual cleanup controls can be used to correct difficult areas where automatic image processing does not perfectly match the shape you want.
Can I use this to create a silhouette from a photo?
Yes. Preparing a clean silhouette is one of the most useful applications of the tool. Isolate the subject, refine important contours and negative spaces, remove unnecessary detail, and then convert the prepared artwork into SVG paths.
What types of photos work best?
Photos with a clearly visible subject, good contrast, defined edges, and relatively uncomplicated backgrounds are typically easier to prepare. More complex images can still be used but may require additional mask and edge refinement.
Is this useful for 3D printing?
Yes. The tool is specifically useful when photographic artwork will eventually become vector geometry used in a 3D model. Cleaning the image first can reduce unwanted geometry and improve the quality of the finished design.
What should I do after preparing my photo?
Continue to the Image to SVG Converter to trace the cleaned artwork into SVG vector paths. From there, download your SVG or use it with a compatible STLPlayground builder.
Turn a Photo Into Usable 3D Artwork
Photographs were never designed to become 3D geometry, but the right preparation can bridge the gap. Isolate the important subject, clean difficult edges, refine the mask, simplify unnecessary photographic detail, and create artwork that is ready for vector tracing.
When your image is ready, continue to the Image to SVG Converter to create your SVG, then explore STLPlayground builders to turn that artwork into a customized 3D printable design.
Related Utilities
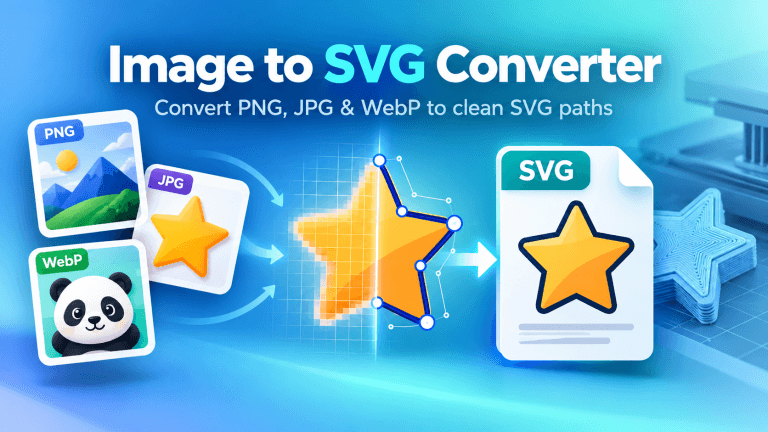
Image to SVG Converter
Convert Images to Clean SVG Vector Files Turn your PNG, JPG, JPEG, or WebP artwork into a clean,…